


Types of refrigeration


Navigate fridges
Types of fridge
 Anchor down
How to measure
Anchor down
Things to consider
Anchor down
Extra features
Anchor down
After you buy
Anchor down
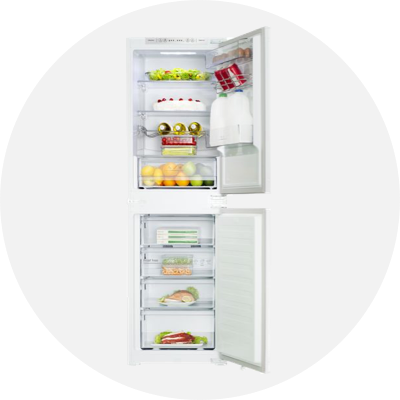
Long gone are the days when you had to have a separate fridge and freezer – now you can get combi fridge freezers.
If you have a freezer, then a larder fridge is a great choice. There’s no ice box so you get maximum space for fresh food. A larder fridge also doesn’t need to be defrosted.
If you don’t have a freezer, then go for a fridge with an ice box or built-in freezer compartment. This will let you store small amounts of frozen food or freeze fresh items when they’re nearing their sell-by date.

Types of fridge

Fridge freezer
The wide choice of fridge freezers on the market can seem a bit overwhelming when it comes time to buy one. But don’t worry, follow our simple advice and you’ll be sure to make the right choice.

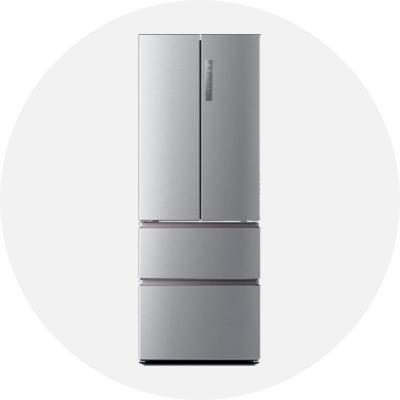
American-style fridge freezer
Bigger, designed with multiple sections, and often with a built-in water cooler, American-style fridge freezers can be one of the best choices for larger families.

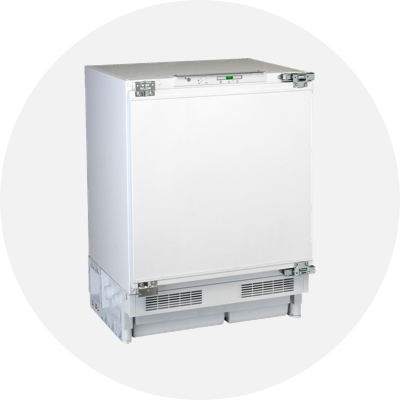
Under-counter fridges
Under-counter fridges are shorter, more compact and can also include flexible storage, Fast Chill and automatic defrost features. They’re a great all-rounder, and work best in smaller houses where space is at a premium.

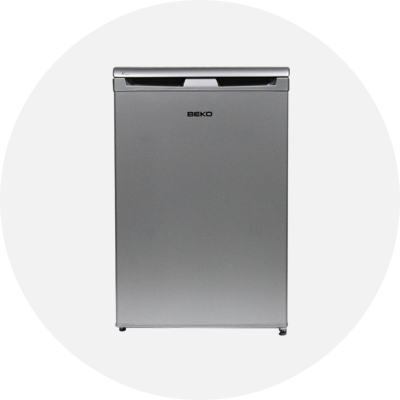
Tall fridges
Tall models let you store more fresh food, and will often have compartments for storing different foods, such as vegetables, raw meat and eggs. Tall fridges also offer a variety of user-friendly features, such as Fast Chill and automatic defrosting, and can be paired with a tall freezer for the ultimate fridge-freezer combo.
How to measure for a new fridge or fridge freezer
First, measure the width and distance from the wall of where you’ll store your new fridge freezer. Once you have these dimensions, you can narrow down the choice of fridges and then decide how much storage space you’ll need, which is decided by the height.
For example, if you have a larger family, you can opt for a taller fridge freezer with more storage. If it’s just for two people, it can be shorter. This will further narrow down your choice so you can move onto fine-tuning which fridge freezer is right for you based on other factors such as energy efficiency and other features.


Overcrowding your fridge reduces the airflow and makes the fridge over-work, increasing your energy bills.
Chloe, Currys tech expert

Extra features to look out for when buying a fridge

Wine rack
A wine rack helps you maximise the rest of your fridge space by keeping those precious bottles of Riesling, rose and Chardonnay securely supported, perfectly chilled and out of the way. If, however, you like to store a larger amount of wine, it may be worth investing in a wine cooler. It will save space in your fridge and give you perfectly chilled wine whenever you want.

Salad crispers
Store your fresh vegetables, salad and fruit in a dedicated drawer that maintains freshness and crispness, keeping nutrients locked in. A salad crisper also helps prevent the transfer of odours between vegetables and other items in the fridge, as well as germs from raw meat and fish.

Reversible doors
With a reversible door hinge, you'll be able to configure your fridge according to the layout of your kitchen. You can open the fridge door to the left or right, so you're not restricted by the position of cupboards and other appliances.

Water or ice dispensers
Some premium fridges feature a water or ice dispenser that lets you enjoy chilled water whenever you like. Dispensers are usually fed by a dedicated, filtered compartment which you can top up manually, though filters must be periodically replaced to ensure optimum freshness. You can also get some water dispensing fridges that connect to the mains water supply..
Navigate freezers
Types of freezer
Anchor down
Things to consider
Anchor down
Extra features
Anchor down
After you buy
Anchor down
An upright freezer is the ideal partner for an upright fridge, and are available in a range of heights and widths for optimum storage. They’re great if you have big storage needs but don’t have a lot of floor space, as the storage volume comes from the height of the appliance, as opposed to the width.
Chest freezers let you freeze food in bulk – they're great for large households and help cut down on shopping trips. Go for a chest freezer with a 4-star freezer rating, as it remains colder which means you can safely store food for up to 12 months.
With their top-opening design, some can be installed in a garage, utility room or outbuilding, giving you a great secondary storage option.

Types of freezer

Chest freezer
Chest freezers let you freeze food in bulk – they're great for large households and help cut down on shopping trips. Go for a chest freezer with a 4-star freezer rating, as it remains colder which means you can safely store food for up to 12 months.
With their top-opening design, some can be installed in a garage, utility room or outbuilding, giving you a great secondary storage option
Choose a small model to store extra desserts, frozen vegetables and ready meals. If you want to accommodate larger cuts of meat, bags of ice and bulky groceries that won't fit in your upright freezer, go for a larger chest freezer. If you do, you can dramatically cut down the number of trips you make to the supermarket, and just pick up additional fresh food items as you require.
Many chest freezers include one or more storage baskets suspended over the main compartment – use them to store smaller items like bags of frozen vegetables or oven chips for easy location and to prevent spillages.
Shop chest freezers

Upright freezer
An upright freezer is the ideal partner for an upright fridge, and are available in a range of heights and widths for optimum storage. They’re great if you have big storage needs but don’t have a lot of floor space, as the storage volume comes from the height of the appliance, as opposed to the width.
Shop upright freezers

Under-counter freezer
Compact and convenient, under-counter models suit smaller homes and make ideal secondary freezers. They also often include flexible storage, Fast Freeze and Frost-Free features.
Shop under-counter freezers
When freezing leftover meals, divide up big batches into smaller portions. It saves time defrosting, and cuts down on waste.
Katrina, Currys tech expert

Extra features to look out for when buying a freezer

Frost free
Frost-free freezers prevent icy build up, so you won't need to defrost them – plus you'll have more storage space. This means you can save time and effort, as you won’t have to go through the laborious defrosting process like with static freezers.
Static freezers require manual defrosting periodically to ensure optimum performance and storage conditions.

Fast Freeze
This ingenious function rapidly lowers the freezer’s temperatures so fresh foods are frozen quicker. Fast freezing locks in nutrients for freshness when defrosting. It's perfect for food that's warmed up on the trip home from the supermarket, or when you need to quickly chill a bottle of wine.

Extra-large drawers
Some freezers have an extra-large drawer or basket for storing large, awkward goods such as Christmas turkeys, large cuts of meat or whole fish.

Ice cube trays
Most freezers include ice cube trays, and some tall models even offer twist ice trays and house a convenient and easy-to-use ice dispenser for keeping drinks cool year-round.
Navigate wine coolers
Number of zones
Anchor down
Things to consider
Anchor down
After you buy
Anchor down
Depending on whether you're a keen collector or regularly serve wine, you'll want to pick a wine cooler that offers ideal storage conditions and maintains the right temperature for instant enjoyment.

Number of zones

Single-zone wine coolers
Single temperature wine coolers are designed for long-term storage and ageing of one type of wine. One temperature is maintained throughout the appliance. They are ideal for wine collectors, since all wine should be stored at 55 degrees and 55-75% relative humidity for proper ageing.
Shop single-zone wine coolers

Dual-zone wine coolers
Dual-zone coolers offer two temperatures and are ideal if you regularly enjoy different wines or entertain often and want to serve wine, champagne or both at the best drinking temperature. You can also age one wine while using the other compartment for chilling champagne to be served at a party.
Wine coolers with two temperature zones can also be set to accommodate red and white wines simultaneously, keeping them in the right conditions so they taste their best when it's time to pour. The recommended serving temperature for white wine is between 7 to 10°C, while red is best served between 10 and 18°C. Champagne is best served chilled, between 6 and 11°C, and rosé between 7 and 13°C.
Shop dual-zone wine coolers


