

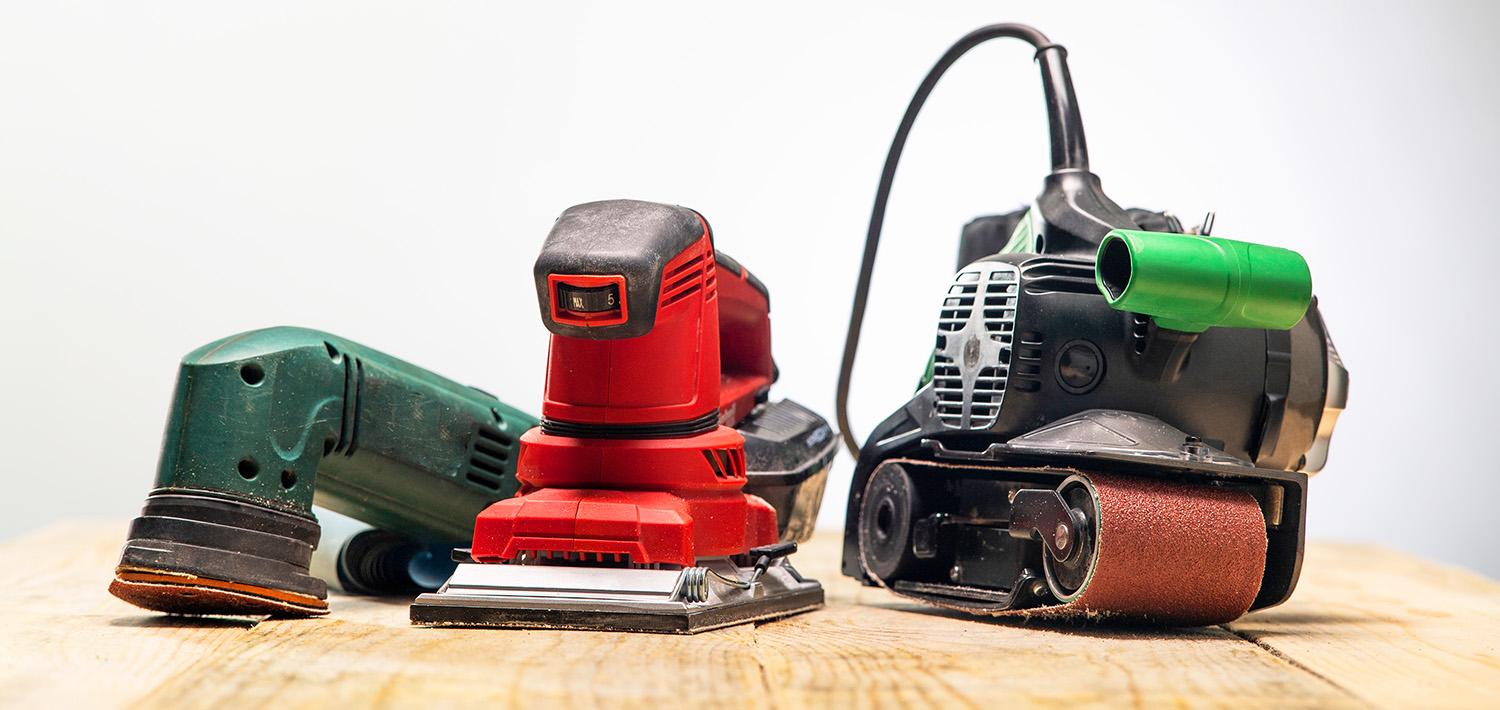
Choosing between a belt sander or orbital sander usually comes down to one of these things: speed or finish. A belt sander is built for fast material removal on large, rough surfaces. An orbital sander is designed for smaller, smoother and more controlled finishing work.
If you’re stripping old varnish from floorboards, flattening timber for shelving, or smoothing out a warped door, a belt sander will save you hours of work. If you’re refinishing furniture, sanding between coats of paint, or prepping wood for staining, an orbital sander is the one to go for.
In this article, we’ll explain how and when to use each sander and answer the most common FAQs. Once you understand exactly what each power tool can do, you’ll be able to pick the right one.
What is a belt sander?

A belt sander uses a continuous loop of sandpaper stretched between two rotating drums. As the belt moves, it removes material quickly and aggressively. This makes it one of the fastest sanding tools you can buy.
Most belt sanders are designed for bigger jobs and flat surfaces. They’re more powerful than orbital sanders, and they work best when you need to remove a lot of wood, paint or varnish in a short amount of time. You’ll often see them used during renovations, woodworking projects and decorating prep. They can look a bit intimidating at first because they remove material so quickly, but they’re incredibly useful.
When to use a belt sander
A belt sander is normally used for heavy-duty sanding jobs. They can strip away old finishes, level uneven boards and smooth large areas a lot faster than an orbital sander. If you’ve ever pulled up old carpet and discovered rough wooden floorboards underneath, this is exactly the sort of job a belt sander is made for.
Belt sanders are great at:
Flattening rough timber before building shelves, furniture or worktops
Removing old paint or stubborn varnish
Smoothing swollen doors that stick against the frame
Levelling decking boards before re-staining
Shaping timber edges during woodworking projects
Preparing reclaimed wood for reuse
Tradespeople typically use a belt sander during the early stages of a project because speed matters. But they’re just as useful for DIY jobs at home. For example, sanding floorboards by hand could take an entire weekend. A belt sander can cut that down dramatically.
To give you a clearer idea, think of a normal-sized room 4 metres by 5 metres (20 square metres). Using a belt sander, you can sand the floorboards in 2–3 hours (depending on the state of the boards and the number of passes you need). An orbital sander would likely take at least 8–10 hours for the same job, possibly longer if the boards are rough or uneven.
Belt sander pros
Removes material quickly
Ideal for large flat surfaces
Great for stripping paint, varnish and rough finishes
Powerful enough for demanding renovation work
Makes flattening uneven timber a lot easier
Saves time on bigger projects
Belt sander cons
Can leave visible sanding marks if you’re not careful
Heavier and harder to control than orbital sanders
Less suitable for delicate finishing work
Not ideal for corners or tight spaces
Noisier and dustier than an orbital sander
How to use a belt sander
If you’re learning how to use a belt sander, there’s one golden rule - keep it moving. A belt sander removes wood very quickly. So, holding it in one spot for even a few seconds can leave dips or grooves that are difficult to fix later.
Start with a coarse grit if you’re removing paint, flattening timber or dealing with rough wood. Something around 40 to 80 grit works well for heavy sanding. Once the surface is level, switch to a finer grit to smooth things out.
Place the sander flat on the surface before powering it on. Then, guide it slowly in the direction of the wood grain using steady pressure. Let the tool do the work rather than forcing it down.
Top tips:
Keep the sander moving at all times
Work through sandpaper grits gradually instead of jumping straight to fine grit
Clamp smaller pieces of wood securely before sanding
Wear eye protection and a dust mask
Empty the dust bag regularly
What is an orbital sander?

An orbital sander moves its sanding pad in small circles or orbits, which creates a much finer finish than a belt sander. A random orbital sander adds a second movement pattern that helps reduce visible swirl marks to give you a more professional-looking finish.
When to use an orbital sander
If belt sanders are the heavy lifters, orbital sanders are the finessed finishers. They’re ideal for restoring furniture, sanding cabinet doors, or prepping skirting boards before you get stuck into decorating. When you want wood to feel smooth ahead of painting, staining, or varnishing, an orbital sander is the one to go for.
Orbital sanders are great at:
Smoothing wood before painting or staining
Sanding between coats of paint or varnish
Refinishing furniture
Removing light paint layers
Polishing surfaces (with the correct attachment)
Prepping plaster or filler patches before decorating
An orbital sander is also far more forgiving for beginners. If you’re a DIY novice, it’s a lot easier to get clean results without damaging the surface. For example, if you’re restoring an old dining table, a belt sander would remove material too aggressively. An orbital sander gives you much more control.
Orbital sander pros
Creates a smoother, cleaner finish
Easier to control than a belt sander
Better for furniture and detailed work
Lightweight and comfortable to use
Orbital sander cons
Slower at removing lots of material
Less effective for stripping thick paint or varnish
Can struggle with heavily uneven wood
Sanding big surfaces can take much longer
How to use an orbital sander
Start by choosing the right sanding disc. Lower grits remove material faster, while higher grits smooth the surface and help with the final finish.
Most jobs need more than one grit. You’ll usually start with a coarser grit, then move to finer grits to smooth out the scratches left behind.
For furniture refinishing, a common order is an 80-120 grit, then 150-180, and finishing around 220 before painting or staining. Skipping straight from a rough grit to a very fine one can leave visible scratch marks behind.
When you’ve selected your grit, attach the sanding disc securely and place the sander flat on the surface before turning it on. Move it slowly and evenly without pressing too hard. Let the sander do the work.
Top tips:
Let the sanding pad glide naturally
Keep the sander flat against the surface
Move steadily with overlapping passes
Vacuum dust regularly so you can spot rough areas
Use finer grits for the final finish
Pro tip: Don’t force the sander down to try and speed things up. It creates uneven sanding and wears out the sanding discs faster.
Belt sander vs orbital sander: at a glance
| Feature | Belt sander | Orbital sander |
|---|---|---|
| Main purpose | Fast material removal | Smooth finishing work |
| Sanding style | Continuous sanding belt | Circular or random orbit motion |
| Best for | Floors, decking, rough timber | Furniture, decorating prep, finishing |
| Speed | Very fast | Slower but more controlled |
| Ease of use | Takes practice | Beginner-friendly |
| Finish quality | Rougher finish | Smoother finish |
| Weight | Heavier | Lighter |
| Paint removal | Great for thick coatings | Better for lighter sanding |
| Hardwood floors | Ideal for major restoration | Only for finishing passes |
| Common choice | Renovation and construction | Furniture and DIY finishing |
Sander grit sizes - a quick guide
| Grit Size | Belt Sander Uses | Orbital Sander Uses |
|---|---|---|
| 40–80 (Coarse) | Removing paint or varnish, flattening uneven timber, heavy material removal | Initial sanding of rough wood, prepping surfaces for finer sanding |
| 100–120 (Medium) | Smoothing out marks left by coarse grit, levelling surfaces | General sanding, preparing wood for finishing |
| 150–180 (Fine) | Light smoothing, prepping for finishing coats | Final smoothing, prepping for paint, stain, or varnish |
| 220+ (Very Fine) | Delicate sanding, finishing touches (less common for belt sanders) | Final finishing, between coats of paint or varnish |
Find the perfect sander for any job
If you’re ready to choose between an orbital sander and a belt sander, go ahead and browse our range of sanders. Or if you’ve got any questions, you can pop in-store and chat to one of our colleagues. They’re always happy to help.
FAQs
What's the difference between an orbital sander and a random orbital sander?
The difference between an orbital sander and a random orbital sander is the sanding motion. A standard orbital sander moves in consistent circles, while a random orbital sander combines circular and spinning movements. The benefit of using a random orbital sander is that it leaves fewer swirl marks and creates a smoother finish on wood.
Can I use a belt sander on hardwood floors?
Yes, you can use a belt sander on hardwood floors. In fact, it’s great for major restoration work. A belt sander removes old varnish, stains and uneven patches quickly. It’s important to keep the sander moving constantly, though, because stopping in one place can damage the floorboards.
Belt sander vs orbital sander for decking: which is best?
For decking, a belt sander is better than an orbital sander for removing old stains, weather damage and rough patches quickly. An orbital sander works well afterwards for smoothing the surface before applying fresh treatment.
Belt sander vs orbital sander for floors: which is best?
A belt sander is usually best for sanding floors because it removes material much faster across large areas. An orbital sander is better suited to finishing work and edge smoothing. For heavily worn wooden floors, belt sanders save a huge amount of time.
Can a random orbital sander be used as a polisher?
Yes, a random orbital sander can be used as a polisher if it supports polishing pads or bonnet attachments. A lot of DIY users polish cars, metal and finished wood surfaces this way. Lower speeds and the correct polishing compound give the best results.
Can an orbital sander be used on drywall?
An orbital sander can be used on drywall to smooth filler, joint compound and repaired patches before painting. Fine-grit sanding discs are best because drywall marks easily. A vacuum attachment or dust extractor also helps manage the large amount of fine dust created during sanding.
Can I use an orbital sander on wood?
Yes. You can use an orbital sander on wood to smooth surfaces and remove light finishes. You can also use it to prepare timber for paint, stain or varnish.
Orbital sanders are especially useful for furniture projects, because they’re easier to control and leave a cleaner finish than belt sanders.
Can I use an orbital sander to polish my car?
Yes, some orbital sanders can polish a car if they support polishing pads and variable speed settings. Some orbital models work especially well because they spread pressure more evenly. This helps reduce swirl marks and lowers the risk of damaging paintwork during polishing.
Can I use my orbital sander as a buffer?
A lot of orbital sanders can be used as buffers with the correct attachment pads. They’re brilliant at buffing wood finishes and polishing metal surfaces. For the best results, choose lower speed settings and soft pads.
Can you use an orbital sander on walls?
Yes, orbital sanders can be used on walls to smooth plaster repairs, sand filler, and prep painted surfaces before decorating. Using fine-grit discs helps prevent any sanding marks from appearing through fresh paint afterwards.
How do I use an orbital sander to remove paint?
To use an orbital sander to remove paint, start with a coarse sanding disc. Move steadily across the surface using light, even pressure. Keep the sanding pad flat and avoid forcing the tool down. Once most paint is removed, switch to finer grits for smoothing.