Whether you drive to the office every single day, or just head out on the odd road trip, a dash cam is a smart move for any driver. Let’s say you get in a scrape on a tight country lane. Or someone cuts you up on a roundabout. It’s there to prove what really happened. Which can save you money and time when it comes to dealing with your insurance. But how do you get one up and running?
We’ll show you how to install a dash cam and answer all your burning questions – from the best spot for it, to the benefits of hardwiring. Let’s roll…

Choosing the right spot
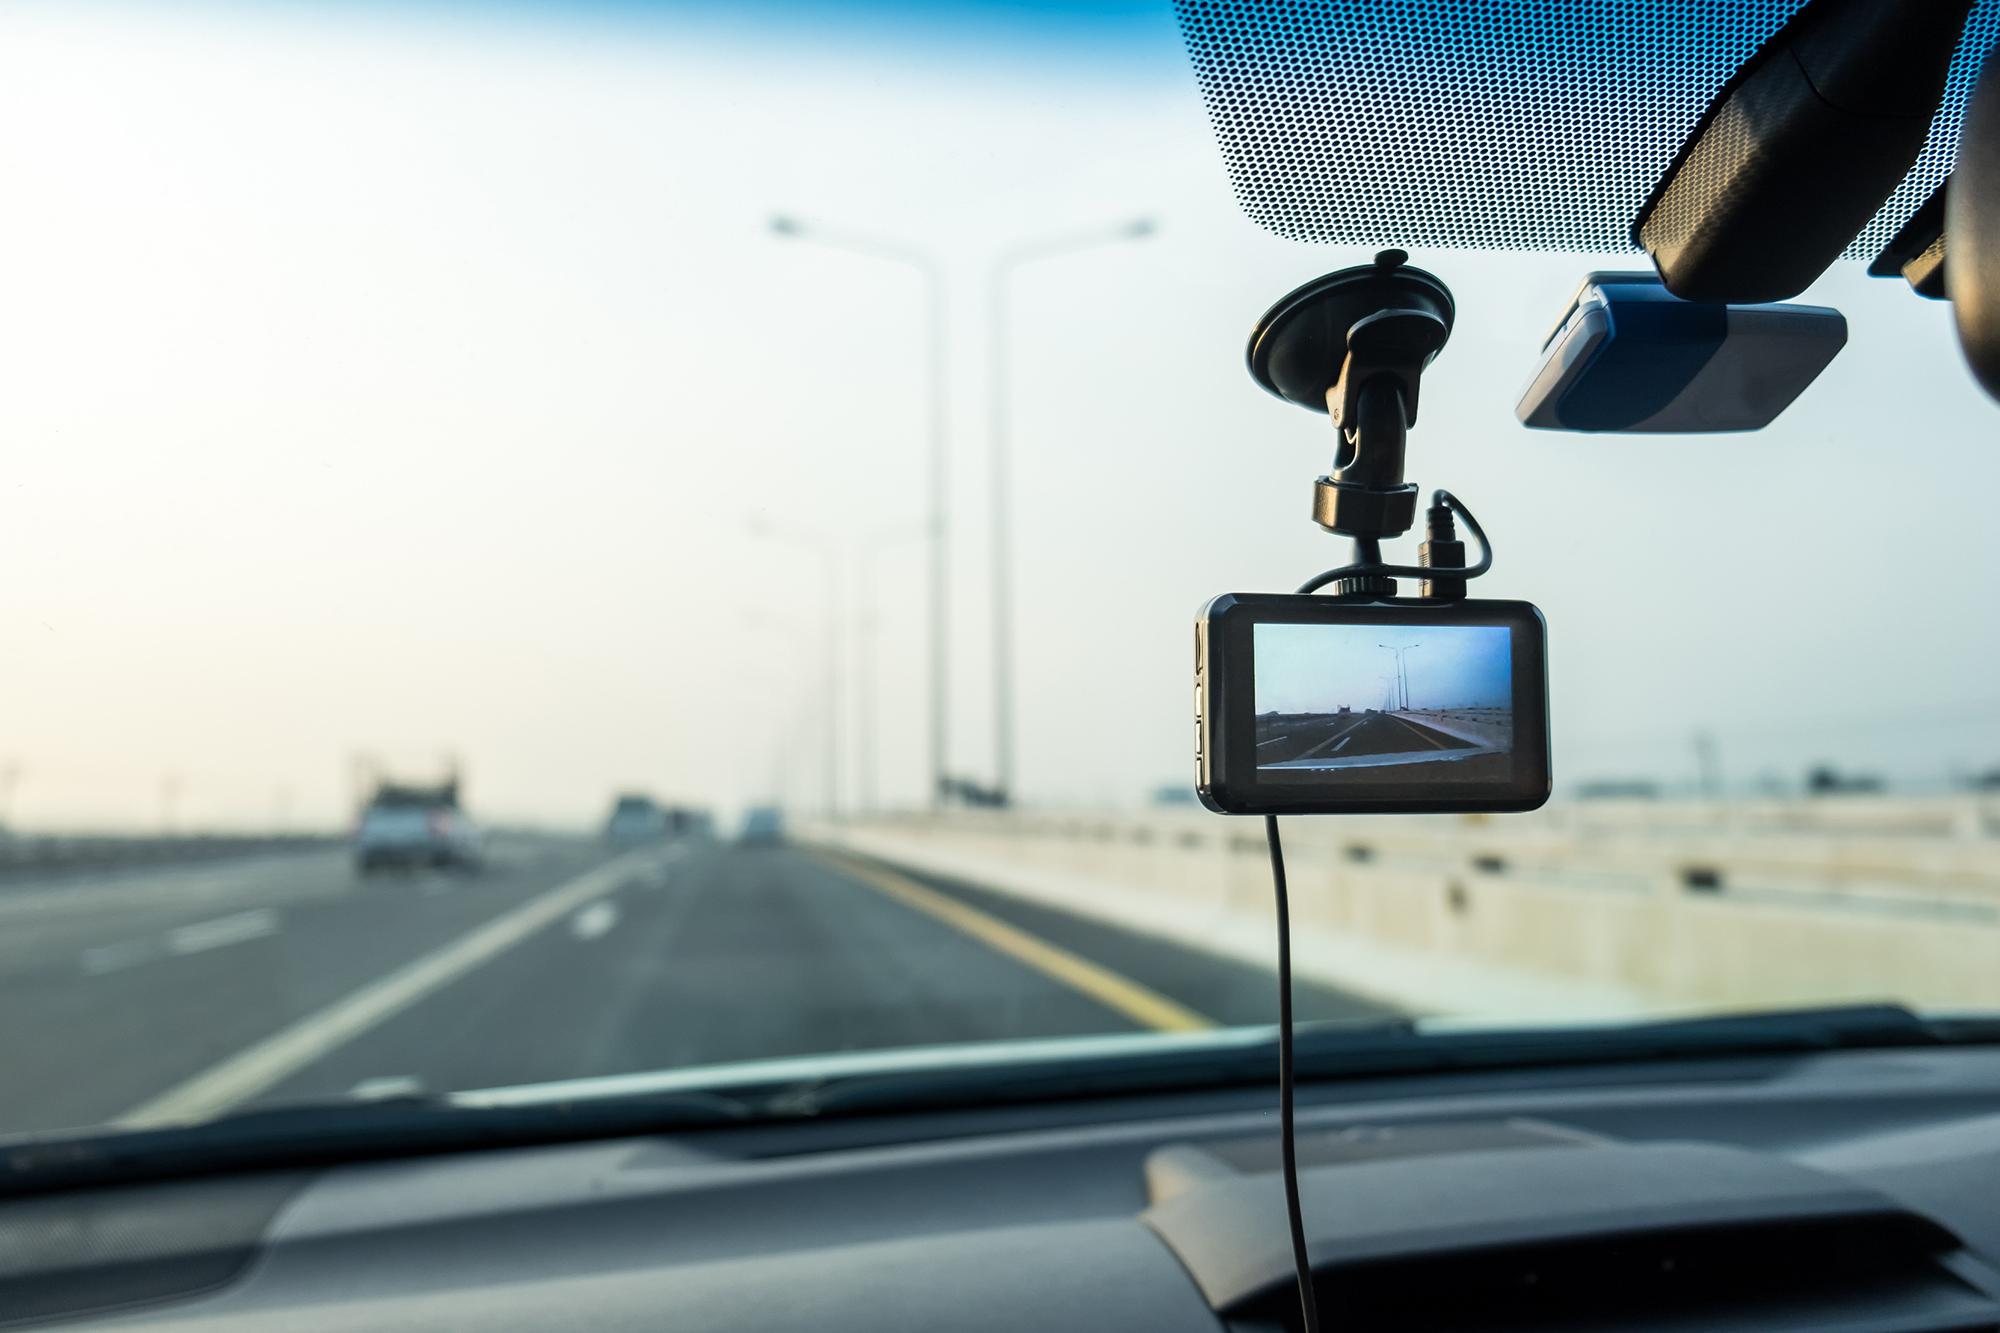
Not sure where to put your dash cam? Pick a spot that gives it a clear view of the road. Most people put it on the windshield, right behind your rear-view mirror. Just make sure it doesn’t block your line of sight!
Dash cam fitting
It might look fiddly, but dash cam installation is pretty easy. And it’s something you can do yourself without an expert. So, here’s how to fit a dash cam:
Get all your bits and bobs together – Most dash cams come with a sticky adhesive strip or suction cup to mount it with, a power cable and a car charger. Make sure you’ve got all of these before you get going.
Find the right position – Like we’ve said above, make sure it’s got an unobstructed view. Sit behind the wheel if you need to get a better idea.
Suction cup mounting – Attach the suction cup to the dash cam. Then, push it firmly onto the windshield and flick the locking mechanism shut.
Adhesive mounting – Peel off the protective strip on the adhesive mount, and line it up with your chosen spot. Press it down firmly to make sure it sticks properly to the windshield. - otherwise, it might slide off when you hit the accelerator! Then attach the cam.
Adjust the angle – You can tilt or swivel most dash cams to find the perfect angle. It needs to be able to see the road, without anything blocking the lens.
Connect the power cable – If it uses a car charger, plug it into your cigarette lighter, then connect the other end to the dash cam.
Secure the cable – Use clips to stop the cable from flapping about. You don’t want it to get caught on anything.
Switch on the cam – Power it on and check that the field of view looks good.
Tweak the settings – Adjust your resolution, time, and date settings. Set your loop recording, G-sensor sensitivity, and parking mode preferences (if it has them) too.
Test it – Take the dash cam for a test drive to check it’s recording properly, and that the footage is nice and clear.

Hardwiring your dash cam
If you want a more advanced setup, you could always hardwire your dash cam instead. This involves connecting it straight to your car’s electrics.
But why bother? Well, when you turn the key in the ignition, your dash cam will fire up automatically. So, you won’t have to physically switch it on every time you go for a spin.
It’ll look a lot cleaner too. You won’t have any annoying cables dangling around that might distract you while you’re driving. They’ll be stored neatly out of sight behind the dashboard. And because the dash cam isn’t plugged into the cigarette lighter, you have a place to charge your phone or plug in a sat nav.
Tech tip: We’d only recommend hardwiring if you’re savvy when it comes to cars and electronics. If you’re keen to do it – but haven’t got the skills - get some professional help!
Heat reflective windscreens
A heat reflective windscreen might interfere with your dash cam…
Reflection and glare – Heat reflective windscreens have a thin metallic coating. And this can create glare and reflections in your videos, especially if it’s sunny outside. If you’re unlucky, it could make your footage completely unusable.
GPS signal – That same metallic layer can play havoc with any built-in GPS. And that might scramble any speed and route data that it’s tracking.
There are ways round all this though. Try popping the dash cam in a different spot first. Experiment with a few positions and test the footage to see if it’s any better. If it isn’t, it’s worth opting for an external mount for the camera.

What to look for in a dash cam
If you haven’t got one yet, here are a few key features you’ll want to keep an eye out for…
Resolution – Go for one with a high resolution (1080p or higher is ideal). This’ll make your footage clearer, which is super handy for capturing number plates and other details during an accident.
Field of view – A wider field of view will record more of the space around your car. If it’s at least 140 degrees, you’ll have better coverage while you drive. So, if someone hits you from the side, it’s got a better chance of recording it.
Night vision – Accidents don’t just happen during the day. Night vision will record detailed video, even in the dark. Look for models with infrared sensors for the best performance.
Loop recording – With loop recording, your dash cam will keep rolling, even when the memory is full. It automatically overwrites the oldest footage, so you don’t have to worry about running out of space.
GPS – This’ll add another layer of info to your footage, like your location and speed. Both of these can help to back up your story, making it useful for insurance claims.
G-sensor – A gravity sensor detects any sudden impacts or movements. When the sensor gets triggered, it locks and saves that clip – stopping it from being overwritten during loop recording.
Parking mode – This feature monitors your motor even when it’s parked. If it gets bumped or scratched, it’ll activate the camera and record any incidents while you’re away from the car.
Wi-Fi connectivity – Connect your phone to the cam and review and transfer any footage without using a PC or laptop.
Audio recording – Has another driver lost their cool? Audio recording can capture any conversations or arguments that might happen after a crash.

FAQs
What are dash cams for?
Dash cams aren’t just made for recording the pretty scenery. They’re there to capture evidence in case you end up in a car accident. Having one in your car can be a lifesaver if you’re trying to prove who’s in the right and wrong. With a video, it should make any legal and insurance claims a whole lot smoother.
How much does it cost to get a dash cam installed?
It really depends on how you install it. If you’re fitting a dash cam yourself, you’ll probably just be paying for the dash cam itself. But if you want a pro to install it for you, it’ll cost somewhere between £50 and £80.
How long does it take to install a dash cam?
With a suction or adhesive mount, you can easily get it done in under 15 minutes. Hardwiring is a bit more technical though, which could take about half an hour. But both will be faster if you get a professional to do it.

So, now you know how to fit a dash cam. Need some more great gadgets for the car? We’ve got top tips to find the best sat nav for you. And if you want to entertain the little ones on a long trip, here are four gadgets to keep kids quiet in the car. You’ll thank us later!